Kiss Me, I'm Irish!
Are you dressed all in green today? You may have noticed that I changed the color around here to reflect my Irish roots!
The weather here is so gloomy, dreary and gray; it's been like this since November. I was flipping through some of my older photos and realized just how much I miss the sunshine! Darling asked me why I take the camera with me everywhere I go, and I told her just in case there was something to take a picture of; then I realized the only thing out there are clouds, clouds, and more clouds!
But since playing a bit in Photoshop, I've discovered I can manipulate those clouds, and I've begun looking at them in a whole different manner. I was on my way to bible study just the other night when I began looking at the clouds. They were thin in areas, puffy in others, and just opaque enough to allow a little light from the sun to glow through. Fortunately for me, I had the camera along and started taking pictures! Unfortunately for everyone else on the road, I had my camera along and didn't pull over before taking pictures!
I'm not sure why everyone was getting their undies in a bunch. Sure, I'd managed to dip down to 45 in a 55 zone. Why were they in such a hurry? Didn't they see how perfectly lovely those clouds were? Don't they know I'm shooting photos for my blog, so that all of you can enjoy them? Didn't that guy in the ambulance recognize just how perfect your timing needs to be in order to capture the light just right before you drive behind a tree and completely miss the photo opportunity? I mean, really...sheesh! Some folks are just all about me, me, me!

In any case, I managed to get this picture below.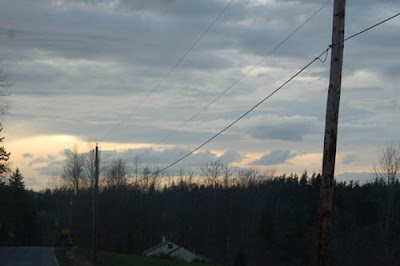 I'm sure you can see why I had to hold up traffic; aren't those clouds just divine? Look at them out there in the distance, with just a hint of gold showing through...
And the tweaked rendition! More gold, less road... So totally worth holding up traffic, don't you think? 


 This is a better example of a before and after on the filters. The original is first, followed by the 'dry brush' filter.